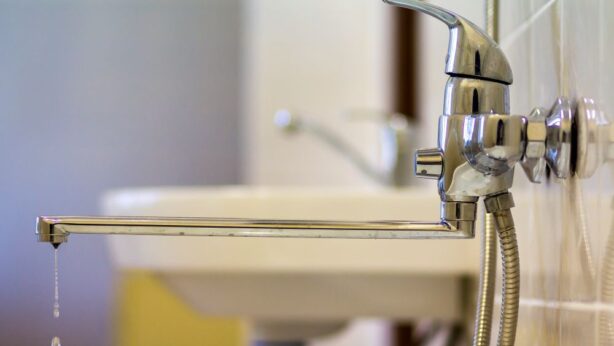
A dripping or leaky faucet is not just an annoyance and inconvenience; it can also lead to water wastage, which costs you higher utility bills. Fixing a dripping or leaky faucet is simpler than you might think. In this blog, we will tell you about many easy solutions for dripping faucet repair.
Understanding the Anatomy of a Dripping Faucet
Before we get into the solutions, let’s look at the basic components of a faucet that are the reasons for dripping. Did you know there are different faucets, including cartridge, compression, and disk faucets? Each type has its unique structure, but they share some common parts that may cause leaks. Let’s explore those parts so you can get that drip fixed in no time.
Valve Seat
One of the main parts that form a seal to stop the water flow is the valve seat, which is a small but essential component that can become worn out over time due to corrosion or sediment buildup, leading to a dripping faucet.
Faucet Cartridge
Cartridge faucets have a cartridge inside that controls the water flow. Their role is to regulate the water’s temperature and pressure.
Rubber Washer
Compression faucets, on the other hand, use rubber washers to create a watertight seal. The function of these washers is to prevent water from flowing through the faucet when the handle is turned off. Regular and frequent use can damage these washers, leading to leaks.
Disk Cylinder
Finally, disk faucets use a disk cylinder to control water flow. This disk cylinder is generally made of plastic or ceramic and can wear out over time, leading to leaks. Knowing these components is essential to identify the root cause of a dripping faucet and take the necessary steps to repair or replace the faulty part.
Fixing Solutions for Dripping Faucets
Let’s discuss easy solutions to fix a dripping faucet of various types, which is an exciting and useful skill to learn. Let’s dive into the world of faucet repair and know how to fix them like a pro!
Fixing a Dripping Compression Faucet
To turn off the water supply valves beneath the sink, you have to find the valves and turn them clockwise until they stop. Now, remove the faucet handle by finding the screw that holds it in place and using a screwdriver to loosen and then remove it.
Once the faucet handle is removed, you can now see the packing nut. Take an adjustable wrench to tighten it by turning it clockwise. After tightening the packing nut, remove the old washer inside the compression faucet and replace it with a new one.
Remember that the new washer should be the same size and shape. This will help prevent leaks and guarantee proper water flow.
Fixing a Dripping Cartridge Faucet
Fixing cartridge faucets is simple and can be easily done with a few basic tools. The first step is to shut off the water supply valves to prevent any water from flowing through the faucet. Once this is done, you can remove the handle and the retaining nut that holds the cartridge.
Depending on the faucet design, you may need pliers or wrenches to remove the retaining nut. Once you have removed the retaining nut, you can now replace the old cartridge with a new one. Make sure to align the new cartridge properly and push it in until it clicks into place.
The next step is to reassemble the faucet in the reverse order and tighten the retaining nut. In the end, turn the water supply back on and check the faucet to ensure it functions properly.
If you encounter any issues, you should consult with a professional plumber. However, with patience and attention to detail, fixing a cartridge faucet can be a simple DIY project.
Fixing a Dripping Disk Compression Faucets
The first step in fixing disk faucets is to close the water supply valves, which are usually located under the sink. Now remove the handle and the disk cylinder mounting screws with a screwdriver. Take out the damaged disk and replace it with a new one.
Be sure to match the shape and size of the old disk with the new one. In the end, reassemble the disk faucet, turn the water on, and check for faucet leaks. If there are no water leaks, you have successfully fixed your disk faucet.
Fixing Valve Seat Issues
To fix the valve seat issues, turn off the water supply, which is usually located under the sink. Now, remove the faucet handle and spout with a screwdriver to do this. The third step is to reach inside with a seat tool or wrench to extract the valve seat.
Make sure that you are turning the wrench counterclockwise to remove it. After doing this, you can replace the old valve seat with a new one. Finally, reassemble the faucet, turn the water on, and check for leaks.
Leaky Faucets? Tommie’s Plumbing Can Handle Any Drip
Contact Tommie’s Plumbing for quick solutions to pesky plumbing issues, especially those troublesome leaky faucets. Our expert plumbing technicians specialize in efficiently fixing a leaky faucet, addressing issues with faucet handles, and ensuring a quick solution for any dripping faucet. We are a family-owned business with three decades of experience in providing plumbing services and serving residents of Tennessee with care and professionalism. We also offer services that include Faucet Repair, Garbage Disposal, and Water Heater Installation.
Our team of plumbing technicians is led by Tommie Haire, who has been in the plumbing business for years and is an expert in almost every plumbing issue, be it stopped-up drain lines for your kitchen sinks, bathroom sinks, shower drains, or your main lines, or outside plumbing work, such as city sewer main lines and water lines from the meter to the house. Don’t drown in drips! Call Tommie’s Plumbing for fast faucet fixes.